Compost bin –
the final straight
The making
of the compost bin has taken longer than expected – well, what doesn’t? anyway,
it is now just about completed and in its final place. So how did we do it –
for those who’d like to build one of their own?
We chose to
use bitumenised corrugated sheeting. It came in both green and black, so we
chose black. It also came in 2m long sheets, with no alternatives, which meant
we were going to have to cut some of it. The other materials were six wooden
stakes, each 1.2m x 100mm x 100mm, and some screws with rubber washers (they
are actually plastic, but soft like rubber).
We gathered
all the materials and tools together before we started – on the site where the
compost bin is to stand. When completed, it was going to be too big to move.
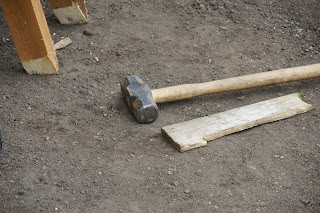
A
big hammer was needed to drive the posts into the ground. We used an
offcut of wood between the post and hammer to protect the top of the post.
OH drove
three wooden stakes into the ground along the wall of the garage. He had chosen
to add the corrugated sheeting after putting in the posts, because firstly it
would be difficult to drive the posts in with the sheeting attached, and
secondly, he thought it best to leave an air gap between the bin and the garage
wall, rather than have the bin right up to the wall.
Next, the
back sheets were attached, overlapping in the middle. The screws went straight through
the corrugated sheeting, so there was no need to drill clearance holes first.
The side
panels were attached next, making sure they were at right angles to the back. These
panels are only half the width of the back panels. Because the panels only came
in 2m widths, we had to cut two in half, to have four 1m wide panels (we only
needed to use three of them). OH recommends using an old saw for this, as the
bitumen panels get hot and sticky and leave a bit of residue on the blade.
Finally, the
centre divider was fitted. Because the centre post was behind the sheeting, it
meant there was nothing actually to attach the divider to, so an additional
piece of wood was cut and this was attached to the centre post, through the
sheeting. Again, making sure the divider was at right angles to the rear panel,
the final post was driven into the ground and the panel attached to it.
Each compartment of the double bin measures approximately 2m x 1m x 950mm.
We still
need to add some bracing to the tops of the posts, to prevent it bending and
twisting in the wind, but it is now ready to be used J


No comments:
Post a Comment