Friday, 30 October 2015

Decorating 5

Sometimes it seems like this decorating lark is never going to come to an end.

However, the good news is - the walls are now fully stripped and we can finally return the steam stripper to the hire company. What should have taken three days has taken a whole week!

Actually, I think it should be made illegal to paint over wallpaper - of any kind, but especially vinyl wallpaper - with vinyl paint. All the stripper seems to do is melt the paint, making a gooey mess. And when the paint comes off, you still have to strip the paper beneath!


Not sure if you can see it properly, but believe me, that piece of paper is hanging on by a horrible stretchy, melted plastic mess!

It has taken hours and hours carefully chipping away at the painted paper to get it all off. 


The walls - completely free of wallpaper at last.

Anyway, with a whole load of effort and hard work, we have finally got rid of all the paper and we are now back to the original wall covering - in the case of one bedroom, brown, white and mustard yellow (as mentioned yesterday - the pics are now uploaded so you can see the colours - and the carpet in the walk-in wardrobe); in the other, green. Actually, the green was beginning to grow on me - anything to avoid looking at more paper covered with vinyl paint!!


A bit blurry, but the colour is evident.

We even laid the radiators on their sides, so the wall behind them has also been stripped.


As you can see, the wall has been damp at one time. Thankfully it is historic, so not much needed as to remedial work. We are going to paint it with a stain inhibitor to make sure it doesn't bleed through the new wall covering. It is a different story in the walk-in wardrobe in the rear bedroom, but that is the subject matter of a different post.

In addition, OH has managed to rewire the hall light so it actually works. 


He pulled out the wall plugs where the stair rail had been, so we are ready to fill the holes. Because the walls are actually made of concrete, the holes are bigger than they might have been, but not to worry - very soon it will be filled in, then covered with new paper and/or paint. 


He was also a great help with the wallpaper stripping - especially when I lost the will to live!


Thursday, 29 October 2015

Decorating 4

Just to show I haven't forgotten that I have a garden and house of my own, here are some random autumn pictures of the beech tree in my front garden and the fallen leaves in the drive:


Anyway, today was another day in the second bedroom. It wasn't as hard as I had thought it might be, thankfully and in fact, I finished the whole room (apart from immediately behind the radiator - that's tomorrow's job).

It must have been an interesting bedroom to sleep in! The wall I stripped yesterday was dark brown.

The wall adjacent to it was white.

The wall opposite the brown one was mustard yellow - lovely!! (Picture to follow)

The whole area is now stripped. I felt like I was in a sauna - there was so much steam. Yesterday I had managed to set off the fire alarm; today I closed the bedroom door and opened the window, but there was still a huge amount of steam circulating.

After I had finished, I cleared the majority of mess off the floor (another 5 bin bags full), but I didn't hoover. We are changing the carpet in this room anyway, so cleaning it thoroughly isn't really necessary. By the time I had completed the floor, the walls and window were beginning to dry off.

Next step is to seal round the skirtings where there are gaps, seal the window reveals, and sort out the damp in the built-in wardrobe. There is a pipe leaking which needs some attention to the flashing at roof level. It's not a difficult job, but getting rid of the mould inside the wardrobe might be. I will need to spray it with a mould killer, leave it to dry thoroughly, wash it, then paint over it with something that prevents stains from penetrating the new wallpaper and/or paint. (Again, pictures to follow - I got carried away with the actual work - and a welcome visitor - so forgot to take pictures while there was still enough light to do so).

Wednesday, 28 October 2015

Decorating 3

This morning I was determined to work on the second bedroom and stripping as much of the walls as possible. But other things needed to be done first.

The previous owners left behind a double bed - but not just any double bed. This is a very heavy electric bed, without a mattress. First of all, we checked if it actually worked. If not, it could be thrown out; if it did, we would need to do some research on mattresses to see if keeping it is viable. But obviously, it would need to be removed from the room before I added a lot of steam and damp to the air!

Yes, it works, so it was upended (on its side) and with some pushing, pulling and a lot of grunting, OH and I got it into the other bedroom.

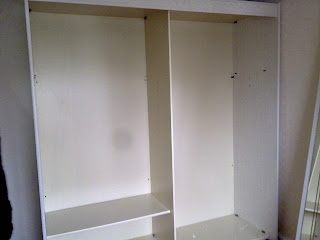
The previous owners had also left a huge double wardrobe with massive mirrored doors. There was no way we would get it out of the room in one piece, so OH set about taking it to pieces. It wasn't particularly straight forward, but eventually he managed and the pieces were again moved to the other bedroom.


The floor where it had been standing was pretty filthy and the wardrobe has left dents in the carpet - not that it matters too much as this carpet is going to be changed in any event. We even found a feather duster!! (That's what the green thing is).


Meanwhile, I was pulling the anaglypta off the wall. That was going pretty well, but I discovered it had been stuck to the wall over the previous paper - nothing new there then! The outside wall, around the window, has a different type of wallpaper and that came off easily too.


You can see the pattern from the anaglypta left on the wall after the paper has been removed.

When the room was last decorated, it was obvious they hadn't been able to move the wardrobe, because the paper was still white, whereas the rest that could be seen easily was cream.


The internal walls were another matter - once again they were a bit of a nightmare. It is uncertain whether letting them get damp by using the stripper is a good idea or not. But without it, the paper was coming off in tiny bits and in places, the pattern on the surface of the anaglypta was coming off, but the paper and its backing was staying firmly on the wall. So I used the stripper. It works, after a fashion. It isn't fast, but at least it softens the glue, making it much easier to pull it off. And there is a thick layer of 'plastic' paint underneath, which turns rubbery when damp and also comes off reasonably easily.

Underneath the yellow and pink wallpaper we found under the anaglypta was a dark brown painted wall - very sixties! It isn't really my colour, but at least the wall seems sound.


So, I have made another big mess to be cleared up after I have another day's work on stripping the walls.


When OH had removed the wardrobe (with minimal help from me), he set about removing the handrail on the stairs. There are two - one each side, so one is still in place and the other is now removed in order to add the stair lift. That wasn't so easy either. The rail was 4m long; the landing upstairs is tiny and the door to the bathroom is at an angle in relation to the stairs. Being a long rail of solid wood, it didn't really bend round the corners! The hallway at the bottom of the stairs is even smaller than the landing; the front door is more awkwardly placed than the bathroom door. So OH had a brainwave - he opened the loft hatch and removed the rail by thrusting it through the hatch. I have no idea how he finally got it downstairs though! 


Monday, 26 October 2015

Decorating 2

First thing this morning, I rang the hire firm and extended our hire of the steam stripper. It looks like we are going to need it for three or four days extra, unfortunately. They were very casual about it - they asked my name and then simply said 'okay, leave it with me'. Hopefully they have actually recorded the fact I rang!

After that, I went to the house to get on with the next stage. The neighbour is also decorating and happened to be working around her front window when I arrived, so we exchanged cheery waves.

Once inside, I did the easy bit first - I moved the living room furniture that has been left behind by the previous owners to one end of the room and covered it with old sheets. I intended to strip as much of this room as possible today, then move the furniture to the opposite end of the room and strip the other end tomorrow morning. More on that later; for the moment, I just moved everything and covered it to protect it from dust and damp.

After that, I went upstairs and cleared the debris off the floor of the bedroom I stripped the other day. There is still some more stripping to do, but I really needed a clearer workspace. It certainly needed it!


I filled five black bin bags with the rubbish.


Then I hoovered the tiny bits off the floor. I have a Dyson, so I had brought it with me to do a thorough job of hoovering. Even so, I hoovered, then put the stair cleaning nozzle on the end, got down on my hands and knees and did the whole floor a second time. For the moment, although the wall still needs some attention, the floor is clear and clean again.


The other bedroom will need to be stripped too. There is a fair bit of furniture in there too, so I moved the chest of drawers and the bedside cabinet out of the room. They need new handles as the current ones are plastic and broken, but when these have been replaced, and the drawer interiors cleaned, they will fit nicely inside one of the huge cupboards in the front bedroom. I hoovered the cupboards out too, ready for carpeting later.

These tasks took less time than I had anticipated, so I filled the steam stripper and turned it on to heat up. Meanwhile, I examined the wallpaper in the living room, to see where I needed to start and determine whether or not it was going to be as difficult as the bedroom had been. Thankfully, I appeared it was just the one layer. But I also realised something else, which proved to be a great time saver. The paper has been been painted in emulsion, but it seems it is nothing more than a decent quality lining paper and has been stuck to the wall horizontally. Provided there are no areas that are damaged - there was already one area, next to the chimney breast that I was aware of - I can simply leave it in place and paper over it. This was a real relief, as it means a LOT less work. I stripped the damaged part and then left the rest. And the second bedroom still needs doing!

By the time I had done all that, it was almost lunch time, so I went home to eat and give my neglected pooch some company. OH came home shortly after me and swapped cars as he had a 'transport' to do - he is a volunteer driver for the Red Cross, so he delivers people to appointments when they don't qualify for an ambulance to take them - NHS cutbacks and all that. Anyway, he set off and I decided to visit a local DIY store to get some bits and pieces - such as some lining paper and some decorators' caulk, to fill gaps around the skirting and the windows. I also got the paint for the kitchen walls and the paper that is going to be a feature in the bedrooms - one for each room. It will go on one wall only; the rest will be covered with a blown vinyl and painted an appropriate colour.

The plan had been to take the purchases to the house, but I realised I had left the keys to the front door in the other car. I would have to wait until OH got home!

Saturday, 24 October 2015

A new house


 Yesterday we collected the keys for a new house – not for us, but for someone who is moving to be closer to us. The house is a mid terrace, with two bedrooms – and we have three weeks to redecorate, sort the electrics, fit a stair lift, replace some carpets – and a few other things.


First thing this morning, I went to the house to check on things like where the electric sockets are located (in case we need extras) and see what other little things might need doing (the kitchen door handle has no internal workings, for example). I also contacted the electricity supplier to give them the final reading for the previous owner and start an account so I could get on with the redecorating.

I do like to do decorating properly, which means stripping the old paper off before putting the new on (I wish that was the same with everybody!)

So OH duly went out and hired a steam stripper to remove the current wallpaper. 


I started in one of the bedrooms, but it wasn’t as easy as I had hoped. The top coat is vinyl paint, on blown vinyl paper, so the paper had to be scored and/or pulled off by hand, before the stripper even touched it. Underneath that was a layer that looked like lining paper that had been painted with white gloss paint. At first, that layer didn’t come off with the top paper; if it had stayed that way, the layer could have stayed in place. But then it started to come loose and chunks of it removed itself, especially where it had been papered over the layer beneath that – which was old fashioned pink floral paper. So that’s three layers, two of which were not as easy as they might have been.


Then the internal walls are like partition walls and appear to be made of frames clad in hardboard. Not sure if that is actually the case, but it behaves like hardboard – if you get it damp with the steam stripper, it pulls away in layers, like cardboard.

Thankfully, not all the walls turned out to be that difficult. The front wall and the wall that joins the neighbour are made of sterner stuff. I was a little concerned about the apparent damp in the front wall - but it turns out it is historic and the wall is completely dry. 


Also, where the double glazed windows have been fitted, the piece that attaches to the internal wall has been put in over the top of the wallpaper! I will need to get as much out as I can, then using decorators caulk, stick the strip of plastic to the wall, and not the paper!


I had hoped to get both bedrooms done today, but with all the layers and having to be careful not to damage the ‘hardboard’ part, I only managed to do half of one bedroom. Half a bedroom, a second bedroom and the living room still to go then! We had hired the stripper for the weekend; looks like we are going to have to extend it to the whole week. That will leave only two weeks to get the redecorating finished and all the other little things that need doing. Still, nothing like a challenge to keep you on your toes J

Thursday, 22 October 2015

More on Winemaking

The elderberry juice-water-yeast-sugar mix has been in the fermenting bucket for five days now, so it is time to pour it into the demijohns. I used 4lbs berries and made the juice up to 2 gallons with plain water, before adding 4lbs sugar. The mixture was frothing away beautifully in the bucket, so I know something was happening.

Using a sterilised jug, I poured the juice into the demijohns. I filled two and had at least enough for another half demijohn left. I was a bit concerned that it seemed to be very frothy and almost 'fizzy'. But a quick check online with people who know about home wine making, and all is apparently well.


I couldn't use the additional juice (or 'must', as it's called) straight away as I only have four airlocks and bungs. I will need to get some more tomorrow and put the rest of the juice into another demijohn.

The bungs and airlocks were pressed into the top of the demijohns and I was pleased to see that it was bubbling away fiercely. I'm hoping that's a good sign!


Meanwhile, the elderflower wine that I started back in the early summer had stopped bubbling and there was quite a lot of sediment at the bottom of the two demijohns. I crushed a campden tablet into the bottom of each of two sterilised bottles, then syphoned the juice into them. All I need to do now is wait until the juice has become clear (a week or two, maybe up to a month), then the wine can be bottled. I must admit it smelled really nice as it transferred from one demijohn to another.


Tomorrow, I might even make some more if today's strong winds have left any berries on the trees.


Tuesday, 20 October 2015

Elderberries, apples and knitted hats

Well, I haven't been totally idle!

A couple of weeks ago, three babies were born to members of the church I attend. Considering we are a very small congregation, that's a lot of babies!! They were born within three days of each other and two of them are twins. So I knitted some little hats:


At the weekend, we had some visitors, bearing gifts in the form of boxes of apples from their tree. We spent Saturday sitting at the kitchen table peeling, coring and chopping apples to put in the freezer. But the freezer doesn't have a lot of space, so we still have a large number to eat as they are.

When we had finished the apples, we gathered some elderberries from the garden. They grow well away from the road, so there is no contamination from road pollution. 


The trees are laden this year. I am told it is a sign we are going to have a hard winter, especially as there are plenty of hips and haws as well. I have to admit, I enjoy snow - just as long as it doesn't prevent the family coming home for the holidays.

So for the first time ever, I am making some elderberry wine.

The elderberries were picked - 4lbs (2kgs) of them - then the berries were stripped from the stalks using a fork.


To release the juice, there are several methods apparently, but I am using the boil-for-30-minutes method, which is the recipe I was given by an online friend.


Once they have been boiled for the appropriate time, they are poured through a very fine net strainer into a fermenting bucket.


They are then left to drain and cool, before additional water is added - we made the juice up to 2 gallons - 2lbs berries per gallon. The strained berries are removed and discarded, and the net washed carefully by hand to remove all trace of elder.

After that, the sugar is added - 1lb for each 1lb of berries, so 2x1kg bags were used. The sugar must be thoroughly dissolved and then the yeast and yeast nutrient is added.

The bucket is then left for five days to ferment. As it is only Tuesday, they have been fermenting for three days so far. The next stage will be to put the liquid into two demi-johns, but that will have to wait for another post.

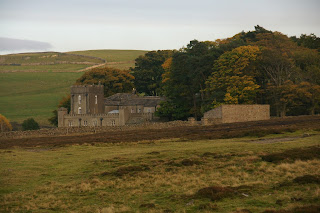
While I am waiting for the elderberries to do their thing, I have been on another walk, this time around Harkerside and Apedale. If you want to read about the walk, you can find it here: http://pathofthestorm.blogspot.co.uk/2015/10/harkerside-and-apedale.html

But as a taster, here are a couple of photos:


Thursday, 15 October 2015

Quite an Adventure

In the interests of showing that HomeGrown is not all about gardening and sewing, here is a link to my other blog, which shows what I get up to for 'entertainment' - well, one aspect, anyway:

http://pathofthestorm.blogspot.co.uk/2015/10/quite-adventure.html

Hope you enjoy the story.

Tuesday, 13 October 2015

The Wanderer Returns

Hi everyone – I’m back! Did you miss me?

Such a lot has happened since I last wrote a post on here. To begin with, OH and I went on holiday. As we do every summer, we took our motor home to Scotland for 6 weeks, for a truly HomeGrown holiday.

We go for the walking and the dancing, mainly, and these days, we also go to meet up with friends we have made over the years. This year, I did a lot of knitting, OH did a lot of walking, and together we did a lot of dancing – Scottish Country, ceilidh, and sequence dancing. Well, I didn’t do the Scottish Country as I am useless at it, but I did the others. We averaged around 7 dances a week, with none on Sundays, which meant sometimes we did two a day!

I have taken to knitting in 4-ply, which means very thin wool on very thin needles. So items take quite some time to complete. I did manage to complete a red cardigan and to start the next item.

We travelled home a couple of times during the holiday too, for family birthdays and to mow the lawns. Even so, the grass was quite high when we finally got back. And the ever present weeds had grown taller too!

One of the things about having All Things HomeGrown is that we also try to be frugal when we buy things. So, when we are on holiday, we often scour the charity shops for bargains. This year, I got a couple of designer handbags for around £10 each, some designer dresses for about £8 each - barely worn, plus a cream jacket and a lovely red coat for the winter. It is still possible to find some true bargains if you look hard.

The following two and a half weeks were spent sewing and knitting, in preparation for a not so HomeGrown holiday I was taking with my daughter in September. It was just the two of us – OH stayed home for this one. In those two and a half weeks, I sewed together the red cardigan, sewed a skirt, a dress and a blazer, all in navy blue. I have been learning about ‘capsule wardrobes’ and how to take all you need for a week or more in a carry-on suitcase. I also managed most of a mustard yellow jumper, but didn’t get it finished – just as well really, as it was not the weather for jumpers, even 4-ply knitted jumpers! Not to mention the size and weight limits were against me for the suitcase.

Anyway, I have been back about a week now. I have finished the yellow jumper and started an aran one for the colder weather (which is already here L ). I am also planning Christmas presents – I have to start early, as I am making quite a few this year, but I’ll not be saying what they are, as some of the recipients are reading my blog too.

Finally, a family member is planning to move closer to us from some distance away, so I am helping with the arrangements for that. The whole house will need to be redecorated and I am hoping to get it all done before the moving date – the only problem is, we don’t have the keys yet!

So that’s a brief update. I will fill you in with some more detail in due time, including our efforts to put the garden ‘to bed’ for the winter and get the house ready for Christmas, when family descends upon us.

Sorry, there are no photographs in this post, but there will be in the following ones.